
Last updated November 17, 2026
 Shaker
 Modern flat-panel
 Two-tone cabinets
 KraftMaid
 Cambria quartz
 Butcher block
 Open shelving
Free design consultation - KraftMaid and Wellborn cabinet lines, Cambria and Silestone surfaces, and every tier from refacing to full custom laid out side by side
Kitchen Remodeling Warning Signs: An Enterprise Homeowner’s Reference Guide
A cabinet door that won’t stay closed is almost never a hinge problem. Nine times out of ten, the hinge is doing exactly what the hinge was designed to do – the cabinet box behind it has racked, and that twist points to either a substrate failure or improper shimming during installation. That’s the uncomfortable truth about kitchen remodels: the failures that cost the most money never announce themselves with a dramatic collapse. They show up as a drawer that’s slightly harder to open than it was six months ago, a caulk seam that reappears after being repaired twice, or a cabinet face that’s no longer sitting flush against the wall. This guide walks Enterprise homeowners through reading those early signals as material-level diagnostics rather than cosmetic annoyances. By the end, you’ll know which warning signs are normal settling, which are warranty claims, and which mean something structural is moving underneath your countertop.
Quick Answer
Most kitchen remodeling warning signs in Enterprise fall into four categories: cabinet box racking from substrate or shim failure, countertop substrate movement showing up as recurring caulk failure, water damage around the dishwasher and sink cabinets, and electrical issues like tripped GFCIs or dimming lights after a remodel. Cosmetic issues resolve with surface fixes; structural issues recur after repair. If a “small” problem keeps coming back after being “fixed,” it’s almost always structural, and it’s worth having a professional diagnose the underlying cause rather than re-caulking or re-tightening a third time.
Styles & brands we work with
- Shaker
- Modern flat-panel
- Two-tone cabinets
- KraftMaid
- Cambria quartz
- Butcher block
- Open shelving
Table of Contents
- How Do You Test Cabinet Box Integrity?
- Why Does Caulk Keep Failing at the Countertop Seam?
- What Does Tile Backsplash Delamination Look Like?
- Water Damage Signs Specific to Enterprise Kitchens
- Electrical Warning Signs That Emerge After a Remodel
- Warranty Claim vs. Normal Settling vs. Maintenance Failure
- What Brand-Specific Failures Tell You
- A Step-by-Step Diagnostic Process for Homeowners
How Do You Test Cabinet Box Integrity?
You test cabinet box integrity by checking three things: whether the box is square, whether the shelves are level, and whether the door gaps are consistent top to bottom and side to side. If any door gap has changed since installation – and most homeowners can’t tell at a glance, so measure it – the box has moved. On a properly installed KraftMaid or Wellborn cabinet, the door reveals stay uniform for years. Variance of more than about a sixteenth of an inch over a door’s height usually means the cabinet box has racked, and that points back to either how it was shimmed to the wall or what it’s fastened into.
Here’s how to run the test yourself in about ten minutes with a tape measure, a torpedo level, and a flashlight:
- Measure the diagonal of the face frame on each cabinet. The two diagonals should match within an eighth of an inch. Any cabinet where they don’t has racked.
- Check the door reveals at the top, bottom, and both sides of every door. Uniform gaps mean the box is true; uneven gaps mean it isn’t.
- Set a level across each shelf front to back and side to side. Shelves that have tilted after installation indicate the box has moved, not that the shelf clips failed.
- Look at the shim line at the wall with a flashlight from underneath. Shims that are loose, split, or missing tell you the cabinet was installed without proper backing.
Cabinet doors that won’t stay closed, doors that bind against the face frame in humid weather, and drawers that stick only on one side are all downstream symptoms of a racked box. They’re the first warning sign a kitchen remodel has a hidden problem, and the earlier you catch it, the cheaper the fix. Our technicians have up to 10 years of experience diagnosing cabinet box issues, and in that time we’ve learned that a homeowner with a tape measure and the right test can catch most of these before they spread.
The reason KraftMaid and Wellborn cabinets hold up so well is dovetail drawer boxes and solid construction that resists racking – but even well-built cabinets will rack if they’re shimmed against a wall that isn’t plumb, or if they’re fastened into drywall rather than studs. That’s an installation problem, not a cabinet problem, and the distinction matters when you’re dealing with a warranty claim. Understanding cabinet installation tolerances is what separates a kitchen that holds up from one that shows its warning signs in the first year.
Why Does Caulk Keep Failing at the Countertop Seam?
Recurring caulk failure at the countertop-to-wall seam is almost always a sign of substrate movement, not bad caulk. The caulk is the canary, not the disease. When the seam splits open every six to twelve months, the countertop or the wall behind it is moving – and no amount of silicone, sealant, or “better product” will fix a moving substrate. Cambria, Silestone, and Caesarstone quartz surfaces don’t move; the substrate beneath them does.
The specific things to look for:
- Caulk that fails in one section and not others indicates localized movement, usually a high point in the substrate or a compromised ledger board.
- Caulk that fails along the entire wall seam points to the countertop not being properly fastened to the cabinet frames or an unsecured substrate.
- Caulk that cracks the same way every time means the movement is cyclical, often seasonal, which points to thermal expansion combined with inadequate seam allowance.
- Caulk that shows shadows or black spots behind it means water is getting in behind the seam, not just failing on the surface.
Enterprise sits at the edge of the Mojave with a wide seasonal swing – hot dry summers, cool desert nights, and low humidity most of the year. That climate stresses the countertop seam more than most homeowners expect, because materials expand and contract at different rates and the seam is where that shows up first. A properly installed Kitchen Remodeling Enterprise countertop has enough machining tolerance and uses fasteners that allow for movement without splitting the caulk every season. If your seam cracks the same way twice, it’s the substrate talking, and it’s worth having someone look at what’s under the quartz.
What Does Tile Backsplash Delamination Look Like?
Backsplash delamination shows up as tiles that sound hollow when tapped, tile grout that cracks in a consistent pattern, and tiles that start to lift at the edges. It’s easy to miss because a delaminating tile often looks fine from across the room. The tapping test is the reliable one: with the handle of a screwdriver, tap a grid of tiles across the backsplash, listening for a clear ring versus a dull thud. A dull thud means the thinset has released from the wall and the tile is only being held by grout.
Three other signs worth knowing:
- Cracked grout lines that follow a vertical or horizontal pattern – grid-shaped cracking usually means the substrate behind the tile has moved, not that the grout was mixed poorly.
- Tiles sitting proud of their neighbors – if one tile is noticeably forward of the ones next to it, it’s lifting off the substrate.
- Any visible gap between the tile and the countertop – backsplash tile is set on top of the countertop, and if that gap is growing, either the tile or the countertop is moving.
In Enterprise, backsplash delamination tends to correlate with the same seasonal swings that affect counters – expansion and contraction against a wall that may not be perfectly flat. The darker side of it is water intrusion: once a tile releases, moisture from the countertop finds its way behind the backsplash and into the wall cavity. Catch it early and it’s a tile-and-thinset repair. Catch it late and it involves drywall, insulation, and possibly the electrical for any outlets on that wall. Tap your backsplash once a year and you’ll never be surprised.
Water Damage Signs Specific to Enterprise Kitchens
Enterprise’s dry climate makes kitchen water damage sneakier than it is in humid regions, because water evaporates from the surface fast while the damage does its work behind and beneath. The signs show up in three places: cabinet box swelling patterns, finish bubbling near the dishwasher, and discoloration at the toe kick. All three are worth investigating immediately, because by the time they show on the outside, the inside has usually been wet for a while.
What each one actually indicates:
- Cabinet box swelling – the bottom panel of a base cabinet swells along its edges first, usually under the sink and around the dishwasher. A bulge or a soft spot in the floor of the cabinet means water has been sitting there long enough to be absorbed. KraftMaid’s engineered materials resist swelling better than budget cabinets, but no cabinet is fully immune to a slow leak.
- Finish bubbling near the dishwasher – bubbling or lifting on the cabinet face near an appliance points to steam or condensation rather than a direct leak. It’s the earliest sign of a dishwasher ventilation issue or a slow door seal failure.
- Discoloration at the toe kick – dark staining, a tide line, or warping at the toe kick means water has been pooling at the floor level and wicking up. It’s often a supply line or a slow drain, not a flood event.
The diagnostic question is where the water is coming from. A Winchester-area kitchen remodel often reveals that the source is the sink supply line, the dishwasher hookup, or a compression fitting that was torqued too tight and has been weeping for a year. Quartz surfaces like Cambria and Silestone don’t absorb water, so a wet countertop drains and dries – but the cabinet beneath it, and the wall behind it, don’t forgive a slow leak the way quartz does.
Electrical Warning Signs That Emerge After a Remodel
Electrical warning signs that emerge after a remodel usually show up within the first year: GFCI outlets that won’t reset, lights that dim when a large appliance kicks on, breaker trips under normal load, and outlets that feel warm to the touch. Each one is a diagnostic indicator, and none of them are things to ignore. Older Enterprise homes often have the “small” version of this – a kitchen that runs the microwave, the dishwasher, and the coffee maker on a circuit sized for one of them – but the warning sign becomes clearer after a remodel when new appliances are drawing more current on the same wiring.
What each warning sign actually tells you:
- A GFCI that won’t reset – the outlet has done its job and detected a ground fault. Don’t keep resetting; the fault needs to be located. It may be a moisture issue in a downstream outlet, a wiring fault, or a failed GFCI.
- Dimming lights when appliances run – voltage drop on an undersized circuit, or a shared neutral. Both mean the circuit is overloaded and needs to be split.
- Breaker trips under normal load – the circuit is at capacity. In a remodeled kitchen, this usually means the appliance load exceeded what was originally planned when the panel was set.
- Warm outlets or plates – loose connections at the outlet terminals, a sign of arcing. This is a genuine hazard and needs an electrician promptly.
Electrical work is one of the places where we always flag the safety caveat: kitchen circuits, GFCI receptacles, and panel work involve live current and deadly risk. This isn’t a DIY category, and a trained professional should trace every one of these warning signs. What we can do as a kitchen remodeling team is identify the warning sign during a remodel inspection and coordinate with a licensed electrician to address it before it becomes a bigger problem than an outlet that won’t reset.
Warranty Claim vs. Normal Settling vs. Maintenance Failure
The distinction between a warranty claim, normal settling, and a maintenance failure determines whether a repair is covered, whether it’s your responsibility, and whether it’s a sign of a bigger issue. Getting this wrong costs homeowners money in both directions – they pay for covered repairs, or they file claims that get denied. Here’s how to sort it:
- Warranty claim – manufacturing defects in materials, installation defects that show within the warranty period, and premature failure of components that should last much longer. Cabinet box racking that traces to improper shimming, countertop substrate failure under a properly installed quartz surface, and delaminated backsplash tile that was installed by the original contractor are all warranty territory. Cambria’s lifetime warranty backs the countertop material itself; the install is a separate warranty held by whoever set it.
- Normal settling – small cracks that appear in the first year as the house and materials reach equilibrium, seasonal changes in cabinet door fit that correct themselves, minor grout cracking in the first season. Normal settling usually stops after the first full seasonal cycle. If it continues into year two, it isn’t settling.
- Maintenance failure – deferred care on the homeowner’s part. A sink that was never re-caulked when the old caulk failed, a dishwasher filter that was never cleaned leading to moisture issues, a toe kick that was never sealed against a puddle. These are your responsibility, but they’re also the easiest to prevent with routine checks.
The single best test for telling these apart is recurrence. A problem that appears once in the first year and doesn’t come back is settling. A problem that comes back after being fixed is structural. A problem that shows up after years of use and correlates with missing maintenance is a maintenance failure. If you’re not sure which one you’re looking at, have it looked at – because the fix for the wrong diagnosis is money spent twice.
What Brand-Specific Failures Tell You
Brand-specific failures tell you something a generic inspection can’t: whether the problem is the material, the install, or the interaction between them. Because we install KraftMaid and Wellborn cabinets, Cambria, Silestone, and Caesarstone quartz, and Kohler, Moen, and Blanco fixtures, we know the failure patterns of each. That fluency is the difference between a diagnosis and a guess.
A few examples of what to look for:
- KraftMaid cabinet door sagging after a few years – the door isn’t failing, the hinge has loosened because the box has racked. Fix the box, not the hinge.
- Cambria countertop showing a seam that keeps opening – the seam is designed to allow movement, but if it’s opening repeatedly, the substrate isn’t allowing that movement correctly. Cambria’s lifetime warranty covers the surface; the substrate is the installer’s responsibility.
- Silestone counter showing discoloration near the sink – Silestone’s mineral-enhanced quartz resists staining, so discoloration here usually points to water infiltration at the sink cutout, not the material.
- Kohler faucet showing drips or low pressure – usually the cartridge, which is replaceable. Moen and Kohler both back their faucets with warranties that cover the internal components for years.
What makes this useful as a diagnostic tool is that a material’s failure pattern is a fingerprint. When you know that a designer-installed Cambria seam should not be re-opening, you know the problem isn’t the quartz – it’s under the quartz. When you know a KraftMaid dovetail drawer box doesn’t sag, you know a sagging drawer is a mounting or load distribution problem. Brand fluency lets us skip the guesswork and go straight to what’s actually moving.
A Step-by-Step Diagnostic Process for Homeowners
If you’re systematically checking your kitchen for warning signs, this is the order to do it in. Each step takes a few minutes and builds on the previous one, so you’ll end up with a clear picture of whether you’re looking at cosmetic wear, normal settling, or a structural issue.
- Walk the cabinet doors first. Open and close every door and drawer. Note anything that sticks, won’t stay closed, or feels different than the others. Measure door reveals on any cabinet that feels off.
- Run the cabinet box test. Tape measure across the diagonals of each cabinet face frame, and check shelf level. This tells you which cabinets have racked.
- Inspect the countertop seam. Look for caulk cracks, listen for hollow spots, and check whether the countertop sits flush against the wall. Any recurring failure in the same spot is a substrate issue.
- Tap the backsplash. Use a screwdriver handle to tap tiles across the backsplash. Every tile should ring clearly. Dull spots mean delamination.
- Look inside every base cabinet. Open the cabinets under the sink, around the dishwasher, and around the refrigerator. Check for swelling, soft spots, or discoloration at the toe kick.
- Test every outlet. Press the test/reset button on each kitchen GFCI. Note any that won’t reset, feel warm, or trip the breaker under load.
- Note the timeline. For each issue you find, ask yourself when it started. First year only usually means settling; recurring means structural; years of use usually means maintenance. This is the step most homeowners skip, and it’s the one that determines what to do next.
If you get through all seven steps without finding any recurring signs, your kitchen is in good shape and you can repeat the check once a year. If you find any recurring sign, that’s the one to have looked at first. A full kitchen remodeling project, done right, is built to resist these warning signs, and the earlier you catch one, the more contained the fix stays.
Common Mistakes to Avoid
- Re-caulking the same seam a third time. If the caulk has failed twice in the same spot, the problem isn’t the caulk – it’s the substrate beneath it, and no amount of new sealant will stop a moving surface. Have the substrate diagnosed.
- Assuming a cabinet door that won’t stay closed needs a new hinge. Hinges on KraftMaid and Wellborn cabinets are built for years of use. A door that won’t stay closed almost always means the box has racked, and replacing hinges just delays the diagnosis.
- Ignoring a GFCI that won’t reset. A GFCI is doing its job when it refuses to reset – it’s telling you a ground fault exists. Keep resetting it and you’re defeating the safety feature. Get it traced by an electrician.
- Filing a warranty claim for normal settling. Some cracking in the first year is expected as the house and materials reach equilibrium. Filing claims on settling-related issues can actually complicate legitimate claims later, because it establishes a pattern of confusion about what’s structural.
- Missing the toe kick inspection. Toe kick discoloration and warping are the earliest signs of a slow leak, and the dark toe kick line hides it well in Enterprise’s low light. Keep a flashlight in the kitchen.
- Assuming the dry climate protects you from water damage. Enterprise’s dry air makes surface water evaporate quickly, but water under the sink and around the dishwasher sits in an enclosed cabinet and doesn’t dry. The climate makes water damage harder to spot, not less likely.
- Interpreting a hollow-sounding backsplash tile as normal. A tile that sounds hollow when tapped has released from the substrate. It looks fine and it isn’t, and catching it early keeps it from becoming a wall-cavity repair.
See the difference
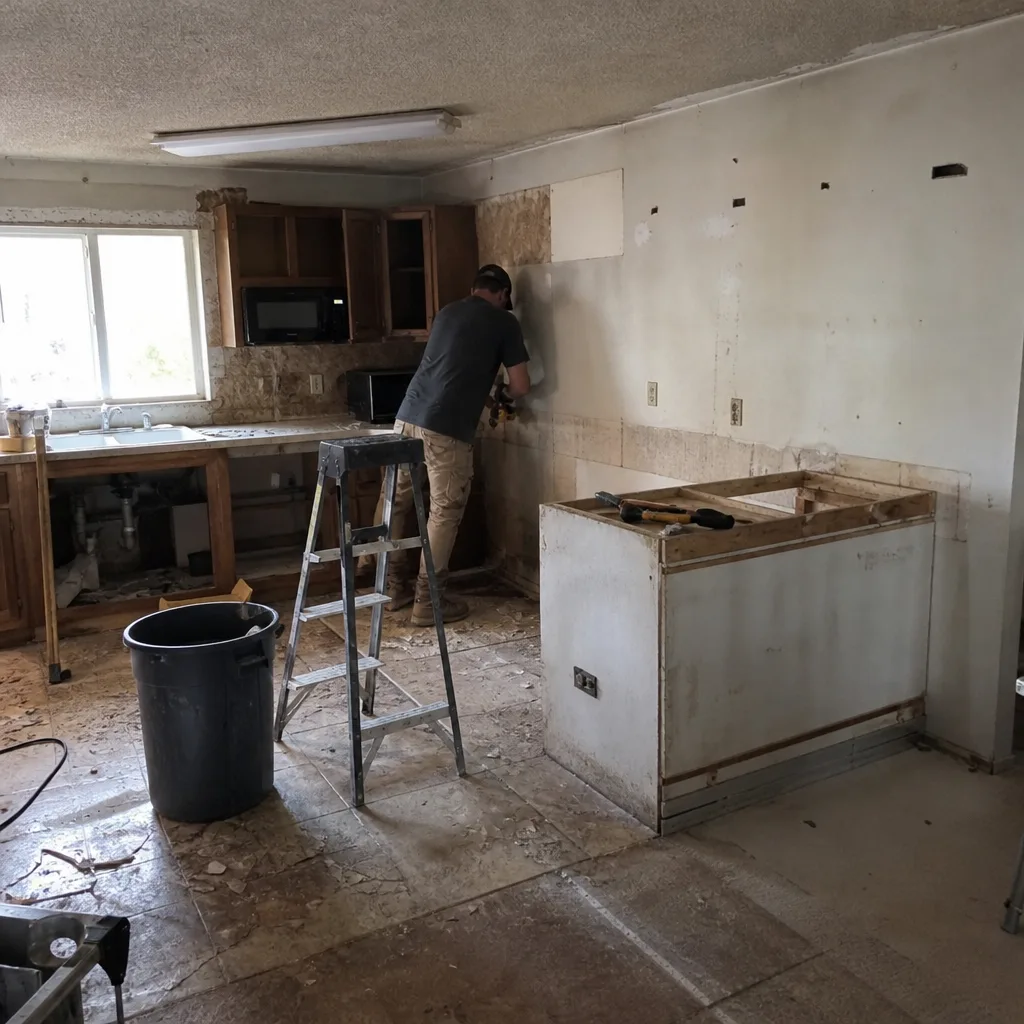 Before
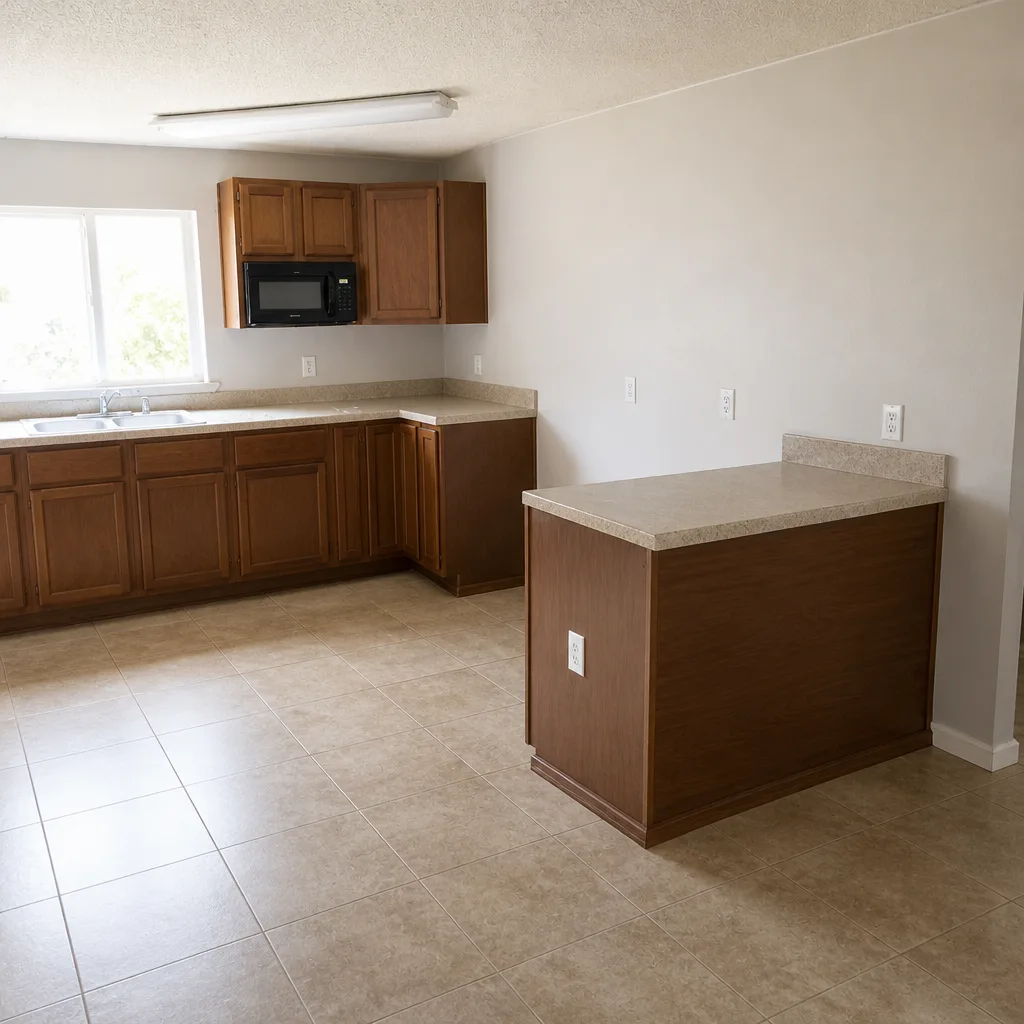 After
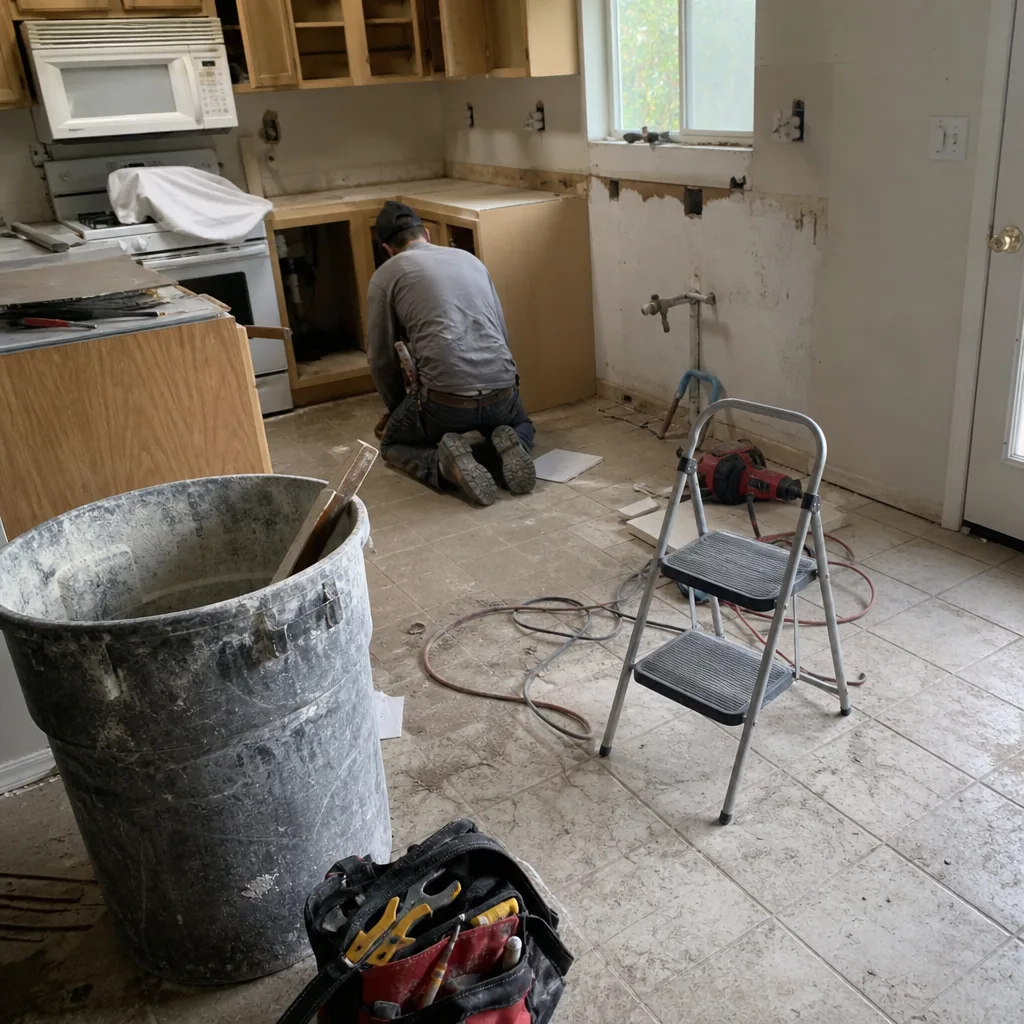 Before
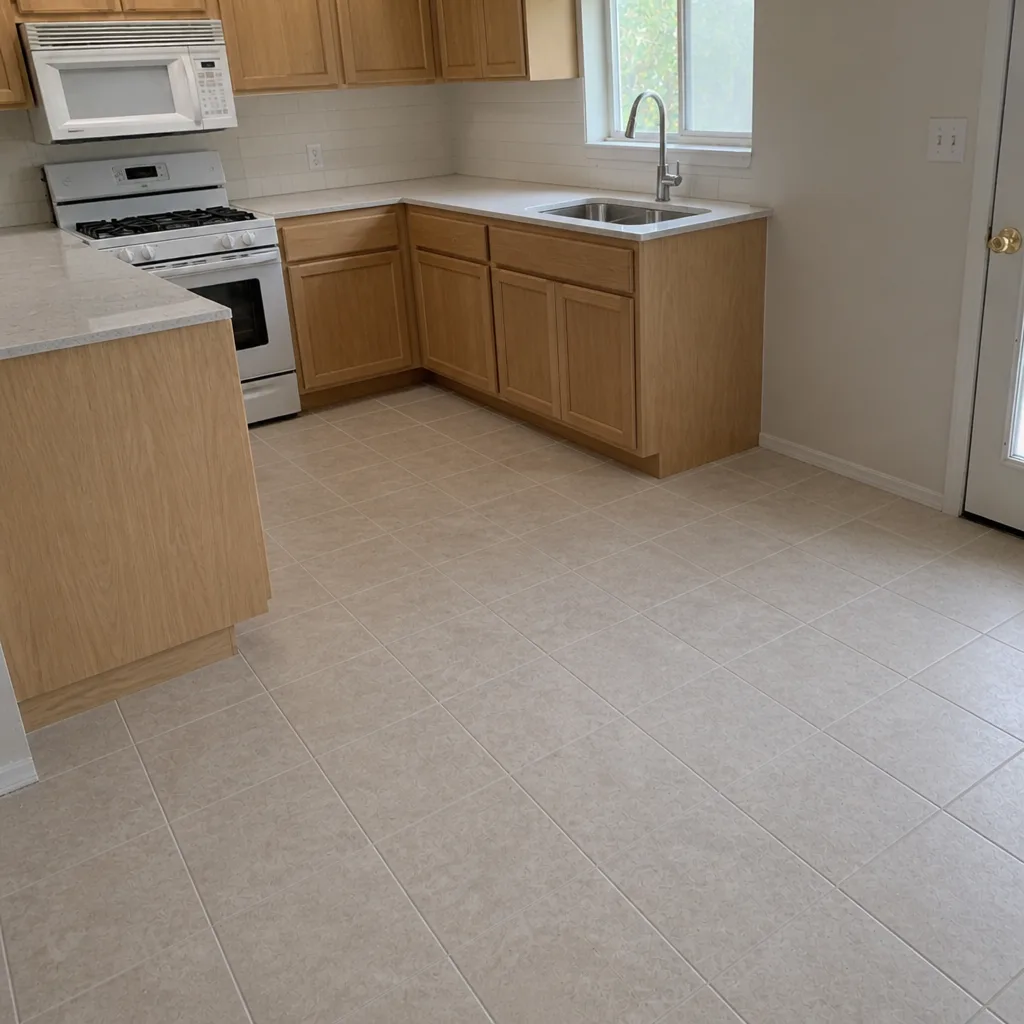 After
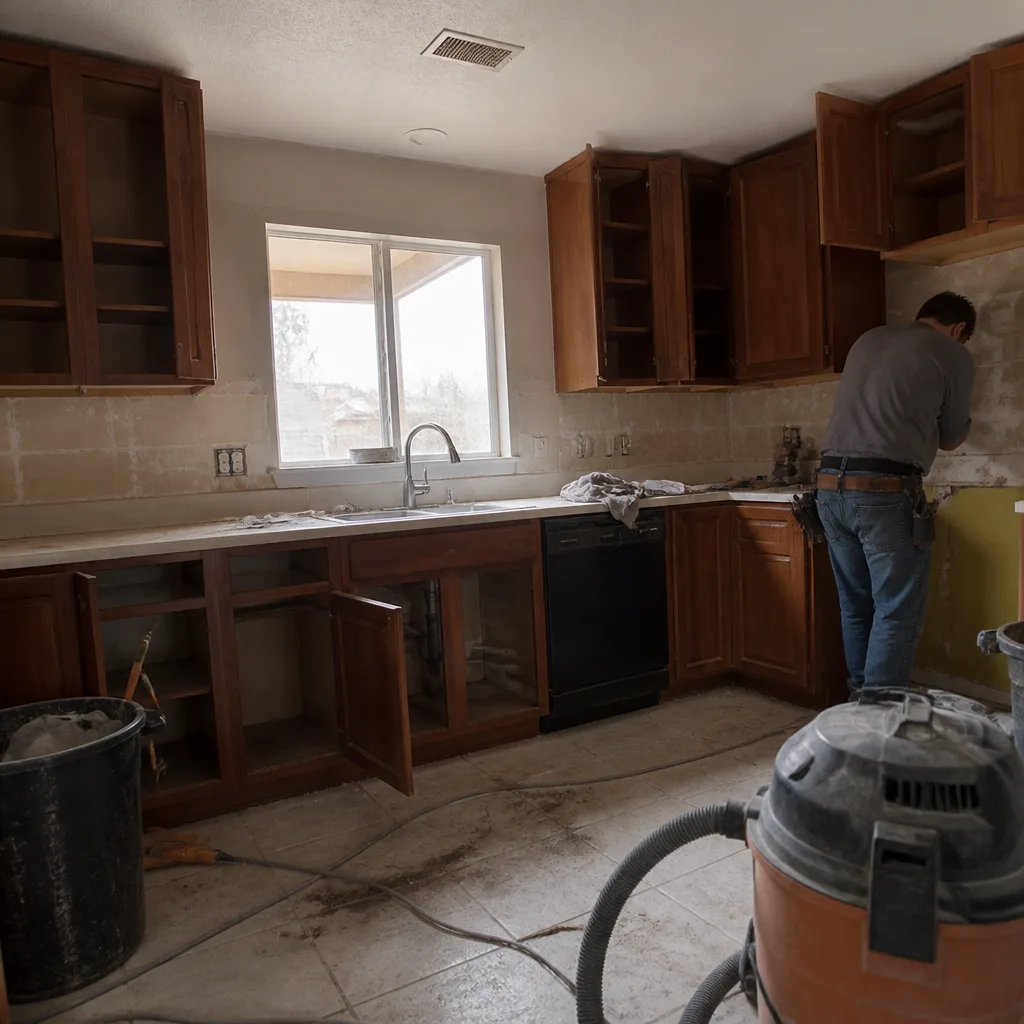 Before
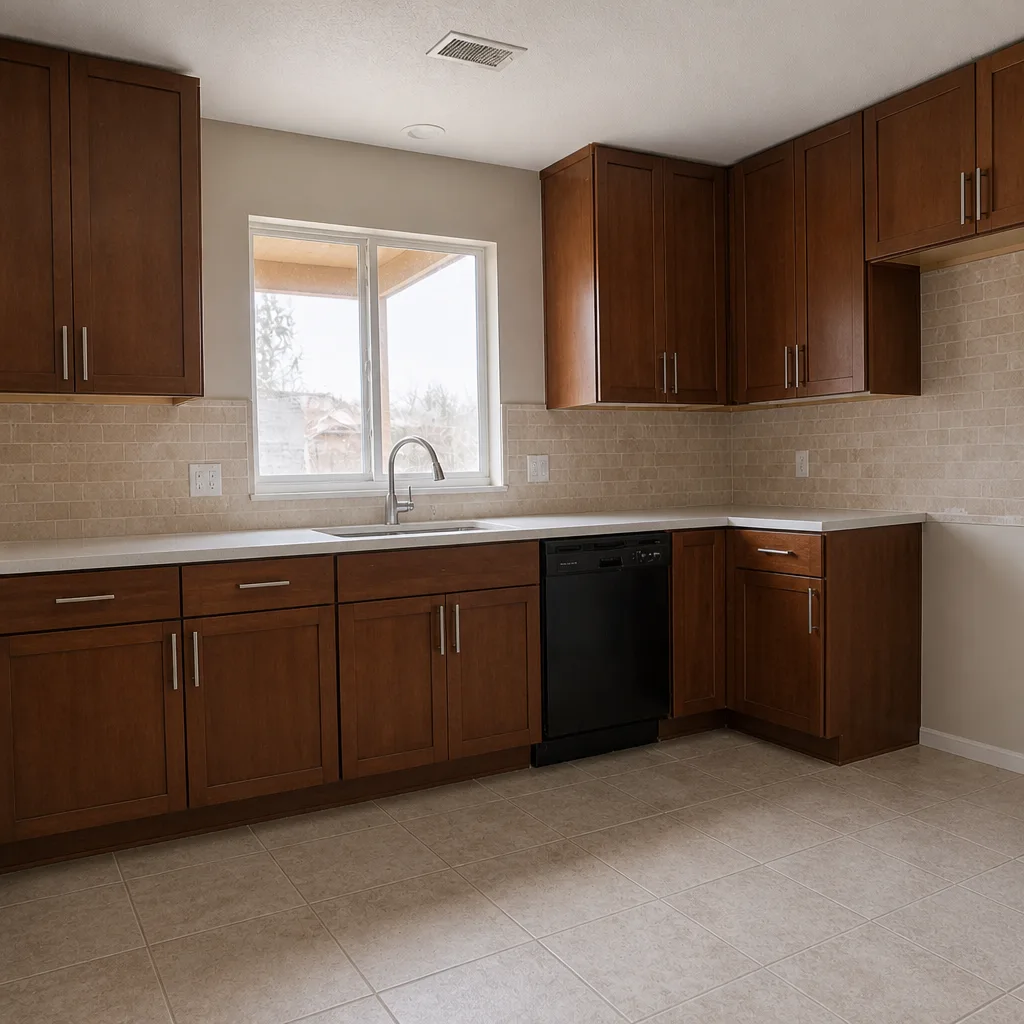 After
When to Call a Professional
Call a professional when a warning sign recurs, when you can’t identify the source, or when the sign points to structural movement rather than cosmetic wear. A cabinet box that has racked, a countertop seam that keeps failing, water staining in a base cabinet, and a GFCI that won’t reset are all worth a professional diagnosis, because the fix depends on identifying the underlying cause rather than treating the symptom. Recurring issues are the clearest signal – if you’ve “fixed” the same problem twice, it isn’t the surface that needs the fix. A countertop substrate issue in a quartz install, a water damage problem that’s reached the drywall, and any electrical issue after a remodel are all cases where a professional diagnosis saves money compared to a third round of homeowner guesses. Kitchen Remodeling Enterprise offers free estimates in Enterprise – call (833) 522-7502. We answer 24/7. Fast dispatch from 7am to 7pm, Sunday through Friday.
Frequently Asked Questions
If the door is failing because of a racked box, the diagonal measurements of the face frame will differ by more than an eighth of an inch, and the door gap at the top of the door will differ from the gap at the bottom. If the door is failing because of a hinge, the hinge itself will be loose or visibly worn while the door reveals stay uniform. Measure the diagonals first – it takes two minutes and it tells you which problem you have. If the box has racked, call (833) 522-7502 for a diagnosis – estimates are free.
Because the caulk isn’t the problem – the substrate beneath the countertop is moving. A premium silicone is the right product, but no sealant can hold a moving substrate. Caulk that fails in the same place repeatedly points to movement in the countertop, the wall, or the fastening between them. Have the substrate checked before you caulk a third time. Call (833) 522-7502 for an exact quote on a repair, and the estimate is free.
Yes – a GFCI that won’t reset is signaling an active ground fault, and continuing to reset it defeats a safety feature. The fault needs to be located by an electrician, and one of the most common causes is moisture in a downstream outlet or a wiring fault in the kitchen circuit. Don’t ignore it. If your kitchen is also due for remodeling work that will address the wiring, call (833) 522-7502 for a free estimate on the project.
Delaminated tile usually needs to be removed and reset, because thinset that has released from the substrate can’t be re-bonded from behind. If the delamination is limited to a few tiles and the wall behind is dry, it’s a localized repair. If the tapping test shows widespread hollow spots, or if there’s any moisture behind the tile, the backsplash needs to be removed and reinstalled on a properly prepared substrate. Call (833) 522-7502 for a free estimate on the repair scope.
Because Enterprise’s low humidity pulls surface water away faster than it does in coastal climates, so visible pooling doesn’t last long. The damage happens in enclosed spaces – inside cabinets, at the toe kick, and behind the backsplash – where the water doesn’t evaporate and the humidity stays high enough for slow damage. The resulting warning signs are subtler, which is why the annual tap-and-flashlight check matters so much here. If you find any of these signs, call (833) 522-7502 for a free estimate on the repair.
The manufacturer’s warranty covers material defects and premature product failure – Cambria’s lifetime warranty, for example, covers the quartz surface itself – and the installer’s warranty covers installation defects like improper shimming, wrong substrate prep, or a countertop that wasn’t fastened to the cabinet frames correctly. Most cabinet racking that traces back to the installation is installer warranty, while a dovetail drawer box that fails on its own is manufacturer territory. Call (833) 522-7502 if you’re not sure which claim applies – we can help sort it with a free estimate.
The Bottom Line
The warning signs of a failing kitchen remodel aren’t dramatic – they’re small, recurring, and easy to dismiss. A door that won’t stay closed, a caulk seam that opens, a tile that sounds hollow, a GFCI that won’t reset, and a soft spot at the bottom of a base cabinet are all early indicators of underlying structural problems. Cosmetic issues resolve with surface fixes; recurring problems are structural and need professional diagnosis. The recurring rule is the one to remember: if a problem comes back after being fixed, the fix was on the wrong layer. Kitchen Remodeling Enterprise helps Enterprise homeowners trace those warning signs to their source and get the repair right the first time. Your kitchen is too permanent to guess on materials, and it’s too expensive to diagnose twice. Call (833) 522-7502 for your free estimate. We answer 24/7. Fast dispatch from 7am to 7pm, Sunday through Friday.
Written by the team at Kitchen Remodeling Enterprise.