
Last updated November 17, 2026
 Shaker
 Modern flat-panel
 Two-tone cabinets
 KraftMaid
 Cambria quartz
 Butcher block
 Open shelving
Free design consultation - KraftMaid and Wellborn cabinet lines, Cambria and Silestone surfaces, and every tier from refacing to full custom laid out side by side
Kitchen Remodeling Emergency Preparedness Guide for Enterprise Homes
The most common kitchen remodeling emergency isn’t a burst pipe or an electrical fire. It’s a refrigerator that loses power overnight because a circuit was tripped during rough-in work and nobody checked the connected loads before leaving the job site. In our experience, the problems that derail a remodel are almost always predictable, documented, and preventable. This guide walks Enterprise homeowners through the emergency prep work that belongs before demo day, not after: shutoff locations, temporary kitchen power planning, containment strategy, and the Nevada rules around gas connections. Read it once before your project starts, and you’ll spend the remodel thinking about cabinet lines and quartz samples instead of damage control.
Quick Answer
Kitchen remodeling emergency preparedness in Enterprise starts with three tasks before demo: photograph and label your home’s main water shutoff, kitchen circuit breakers, and gas shutoff; plan a temporary kitchen with dedicated power for a mini-fridge and microwave; and confirm that any gas appliance connection gets inspected and certified by a licensed Nevada plumber before it’s put back in service. Build a containment plan for dust and moisture around adjacent rooms at the same time. Do these four things and most remodeling emergencies never happen.
Call (833) 522-7502 for a free estimate on your kitchen project. We answer 24/7, and it’s a chance to walk through your specific layout and shutoff locations with us before work begins.
Styles & brands we work with
- Shaker
- Modern flat-panel
- Two-tone cabinets
- KraftMaid
- Cambria quartz
- Butcher block
- Open shelving
Table of Contents
- Pre-Construction Checklist: Locate Every Shutoff Before Demo
- Water Leak Behind Cabinets: The First 10 Minutes
- Temporary Kitchen Planning for a 3 – 6 Week Remodel
- Protecting Adjacent Rooms From Dust and Moisture
- Gas Appliance Reinstallation: Why Nevada Licensing Matters
- Electrical Trips and Connected Loads During Rough-In
- Why Material Choice Affects Emergency Risk
- Handover Day: What Your Contractor Should Give You
Pre-Construction Checklist: Locate Every Shutoff Before Demo
Before a single cabinet comes out, you should know exactly where three things live in your home: the main water shutoff, the kitchen’s circuit breakers, and the gas shutoff feeding your range. Most homeowners can point to the main breaker panel but have no idea where the water shutoff is, and that’s the one you’ll need fastest if something fails. Do this walkthrough with your contractor on day one. It takes 20 minutes and eliminates the worst kind of panic.
- Find the main water shutoff. In most Nevada homes it’s at the meter box near the street or in a utility closet. Turn it a quarter turn to confirm it moves, then turn it back. If it’s stuck, that’s a plumbing issue to fix before demo, not during.
- Find the kitchen circuit breakers. Open the panel, identify which breakers control the refrigerator, microwave, dishwasher, disposal, and counter outlets. Label them with tape if they aren’t already.
- Find the gas shutoff. For a gas range, the shutoff is typically behind the range or under the floor. Learn the quarter-turn motion and confirm it’s accessible.
- Photograph everything. Take clear photos of each shutoff in the open and closed positions. Store them in a phone album called “Kitchen Remodel.” If anyone on the project needs to act fast, the photo answers the question.
- Share the album. Send the photos to your contractor, and confirm the file is in your project thread. This is the single most useful thing you’ll do in week one.
Homeowners in Enterprise neighborhoods with slab foundations should pay particular attention to the gas shutoff location; it’s sometimes under a floor access panel that gets covered by new cabinetry during the redesign. Mark its location on the plan before cabinets go in so the next person doesn’t have to hunt. If you’re planning your first major renovation, our Kitchen Remodeling Enterprise page is the right place to start.
Water Leak Behind Cabinets: The First 10 Minutes
The first 10 minutes of a water leak behind new cabinetry determine whether you’re dealing with a towel-dry fix or a floor replacement. Be calm, act in order, and don’t do anything you’ll regret.
- Shut off the water. Go straight to the main shutoff, not the under-sink valve. The under-sink valve may be the leak source, and if you can’t reach it, the main is your only reliable stop.
- Kill power to the affected circuit. If water has reached outlets or appliances, flip the kitchen breakers before you step in. Water and live current do not mix.
- Do not move the cabinet. Pulling a cabinet to “see what’s happening” can tear a supply line or dislodge a drain fitting, making the leak worse. Water finds the floor on its own; let it.
- Contain and document. Put towels at the edge of the wet zone. Take a short video of the leak location before anything is dried. Your contractor will need it.
- Call your contractor, and call a plumber if the supply line is the source. A leak from a supply line or drain fitting behind a wall is a plumbing job, not a carpentry job. Your contractor handles the cabinet side; the plumber handles the water side.
Most under-sink leaks in Enterprise homes start at a compression fitting that was tightened for the old sink and reused for the new one. We use new supply lines and new shutoff valves on every install for that reason, but if your contractor hasn’t said the words “new supply lines” yet, ask. For more on planning the cabinet side of the project, see cabinet installation.
When to Call a Plumber vs. Your Contractor
- Call a plumber: active water coming from a supply line, drain fitting, or wall; water in a wall cavity; a leak that doesn’t stop when the under-sink valve is closed.
- Call your contractor: condensation under a sink, a slow drip at a P-trap you can see, water pooling on a countertop from an unknown source.
- Call both if unsure: the plumber stops the water, the contractor assesses the cabinetry and floor. Better to have both on-site than to guess.
Temporary Kitchen Planning for a 3 – 6 Week Remodel
Most full kitchen remodels in Enterprise run three to six weeks from demo to handover. During that window, you’ll cook from a temporary setup in another room. Get this wrong and the remodel is miserable; get it right and the weeks pass with minimal friction.
Power requirements. A mini-fridge draws about 1.5 amps at 120 volts, and a microwave draws anywhere from 8 to 15 amps depending on wattage. Don’t put them on the same circuit as a space heater, and don’t daisy-chain the setup off a single kitchen outlet that’s about to be disconnected. Pick a room with a dedicated 20-amp circuit, or a room whose load is low (a dining room or home office usually qualifies). Test the circuit by running the microwave and watching for a breaker trip before you rely on it.
Temporary kitchen layout. Plan for a microwave, mini-fridge, coffee maker, and a folding table for prep. Put the table near a sink you still have access to (a bathroom or laundry sink works). Keep a small countertop cutting board and a dishpan so you don’t clog the bathroom sink with food waste.
Outdoor cooking in Clark County. Homeowners often plan to cook outdoors during the remodel. That’s fine for a barbecue grill on a patio, but remember that Clark County fire rules restrict open flames during fire restrictions, and propane cylinders have to be stored upright and away from living space. If you plan to grill through the remodel, confirm the current restriction status with the county before you light anything, and never use a gas grill or propane camp stove indoors or in a garage.
Protecting Adjacent Rooms From Dust and Moisture
Dust travels farther than most homeowners expect. If you don’t contain it, you’ll find construction dust on top of door frames in rooms two hallways away. Moisture travels with it, and that’s the bigger problem: a wet dust film on hardwood floors can etch the finish, and dust pulled into an HVAC return will spread through the whole house.
- Seal doorways with zip-wall barriers. A plastic zip-wall with a zipper door in the kitchen doorway is the standard. Tape the edges to the frame, not the wall paint.
- Cover HVAC returns. If a return vent is inside the kitchen, cover it with a magnetic vent cover or taped plastic and run the system off during dusty work hours. Never seal a supply register without also sealing the return; the system will strain.
- Protect the floor beyond the kitchen. Cardboard and rosin paper over hard flooring, plastic sheeting taped at the transition point. Change the sheeting when it gets dusty; it loses grip and becomes a walking hazard.
- Watch for moisture outside the kitchen. If you see a wet spot on a hallway wall or ceiling near the kitchen, stop work and investigate. Water migration from a failed fitting starts small.
- Run the fan and open a window. In Enterprise’s dry climate, dust settles quickly if you ventilate. A box fan in a window pulling air out of the kitchen during lighter work keeps the rest of the house cleaner.
Containment isn’t just nice-to-have; it’s part of how a professional kitchen job is done. Our kitchen remodeling projects include daily cleanup and a containment plan as part of the standard scope. If a contractor skips this conversation during the estimate, ask why.
Gas Appliance Reinstallation: Why Nevada Licensing Matters
Nevada requires gas appliance connections to be made and certified by a licensed gas plumber. That’s true even if your contractor handles every other part of the kitchen install and even if the appliance “just slides back into place.” A gas connection isn’t a carpentry task, and no amount of general remodeling experience substitutes for the licensing and the test.
Here’s what the reinstallation process should look like:
- Confirm the shutoff is closed and the gas is off before any appliance is disconnected.
- Inspect the flexible connector. It should be replaced if it’s older than the appliance, kinked, or corroded. New ranges are typically supplied with a new connector; use it.
- Seal and tighten the connection to the appliance’s spec, then test every joint with a leak-detection solution.
- Confirm the burner flames look right after reconnection. Orange or lazy flames can indicate a mixture or pressure problem.
- Get the certification on record. Ask for the licensed plumber’s certification before you consider the job closed.
If your contractor says “we’ll handle the gas line,” ask whether a licensed plumber is doing the connection and providing the certification. If the answer isn’t a clear yes, that’s the moment to slow down. Gas is the one part of a kitchen remodel where a shortcut doesn’t just cause damage; it causes danger.
Electrical Trips and Connected Loads During Rough-In
During the electrical rough-in phase, electricians often turn off circuits to work safely, and those circuits sometimes get left off. The refrigerator goes dark, the freezer defrosts overnight, and by morning you have a much larger problem than a tripped breaker. This is the exact failure the opening of this guide described, and it’s preventable with a load check.
Before the electrician leaves for the day, ask them which circuits are off and confirm whether the refrigerator is on any of them. If the fridge needs to stay running, ask for a temporary dedicated circuit or a plan to keep it on a live outlet elsewhere in the home. Confirm the check every evening during rough-in week. It’s a 30-second conversation that saves a refrigerator’s worth of food and cleanup.
After the kitchen is wired, check the new loads against the panel: a modern kitchen run with an induction cooktop, double oven, and a countertop circuit can add 60 to 100 amps. If your panel hasn’t been evaluated for the new load, have that done before the appliances arrive. It’s a smaller job than dealing with a panel upgrade mid-install. Electrical work belongs to a licensed electrician; this is one of the components you never troubleshoot yourself.
Why Material Choice Affects Emergency Risk
The materials you choose during planning change how your kitchen handles a surprise. Quartz surfaces like Silestone and Caesarstone are non-porous, which means a minor leak or spill wipes clean without moisture soaking into the surface. Compare that to wood or porous tile, where water can sit in seams and travel under a counter. Quartz also tolerates the mild cleaners you’ll want on hand for quick cleanup during an active remodel.
Under-sink cabinetry is where emergency risk concentrates. A cabinet built with moisture-tolerant panel and a solid cabinet floor resists swelling if water reaches it; a cabinet built with a particleboard base can swell and delaminate in a single slow leak. Ask your cabinet manufacturer about moisture resistance in the sink base cabinet specifically. When we install cabinet lines like KraftMaid and Wellborn, that’s the question worth asking before the order is placed.
Fixtures matter too. A sink from Kohler or Blanco with a solid drain assembly and a high-quality faucet from Moen reduces the chance of the small leaks that turn into cabinet damage. Cheap hardware is the usual culprit behind a slow drip that nobody notices until the cabinet floor is warped. Every fixture, every detail, should be chosen with an eye toward what happens if something goes wrong six months after install.
Handover Day: What Your Contractor Should Give You
Walkthrough day is when emergency prep either pays off or gets forgotten. Before your contractor leaves the job, ask for this set of information in writing and in photos:
- Updated shutoff locations and the photos from week one, in case anything moved.
- An updated breaker label list reflecting the new kitchen circuits, with what each breaker controls.
- The gas certification document if any gas appliance was reconnected.
- Manufacturer warranty documentation for cabinets, countertops, and fixtures, organized in one folder.
- Contact information for the licensed plumber and electrician who worked on the job, in case a follow-up question comes up.
- Care and cleaning instructions for quartz, cabinetry finish, and any specialty hardware.
This is the paperwork most homeowners never ask for and then can’t find when they need it. If you’re remodeling in an Enterprise neighborhood where your home is a few years old and your panel labels were already incomplete, the updated list on handover day is a fresh start. For local context and how we approach projects in your area, see our Winchester page. If you want a fuller picture of how we manage kitchen projects from first estimate to handover, our main service page covers it.
Common Mistakes to Avoid
- Assuming the main water shutoff works. Many homeowners never test it. Turn it once before demo; a stuck valve discovered mid-leak is much worse.
- Leaving the fridge on a circuit that gets turned off. Rough-in work kills circuits routinely. Confirm each evening which circuits are live and where the refrigerator is plugged in.
- Trusting the “we’ll handle the gas” promise without a license check. In Nevada, only a licensed gas plumber can certify the connection. Get the name and the certification in writing.
- Skipping the containment plan to save a day. Dust in HVAC returns and on hardwood beyond the kitchen is much harder to fix than to prevent. Zip walls and magnetic vent covers go up before demo.
- Choosing under-sink cabinetry on price alone. Particleboard bases swell and delaminate after a single slow leak. Ask about moisture resistance in that one cabinet specifically.
- Forgetting the temporary kitchen load plan. Plugging a mini-fridge and microwave into one 15-amp circuit in an Enterprise home with older wiring is a recipe for a mid-remodel trip. Test the circuit first.
- Not asking for the handover folder. Updated shutoff photos, breaker labels, gas certification, and warranty paperwork in one place makes your next emergency a 30-second fix rather than a search.
See the difference
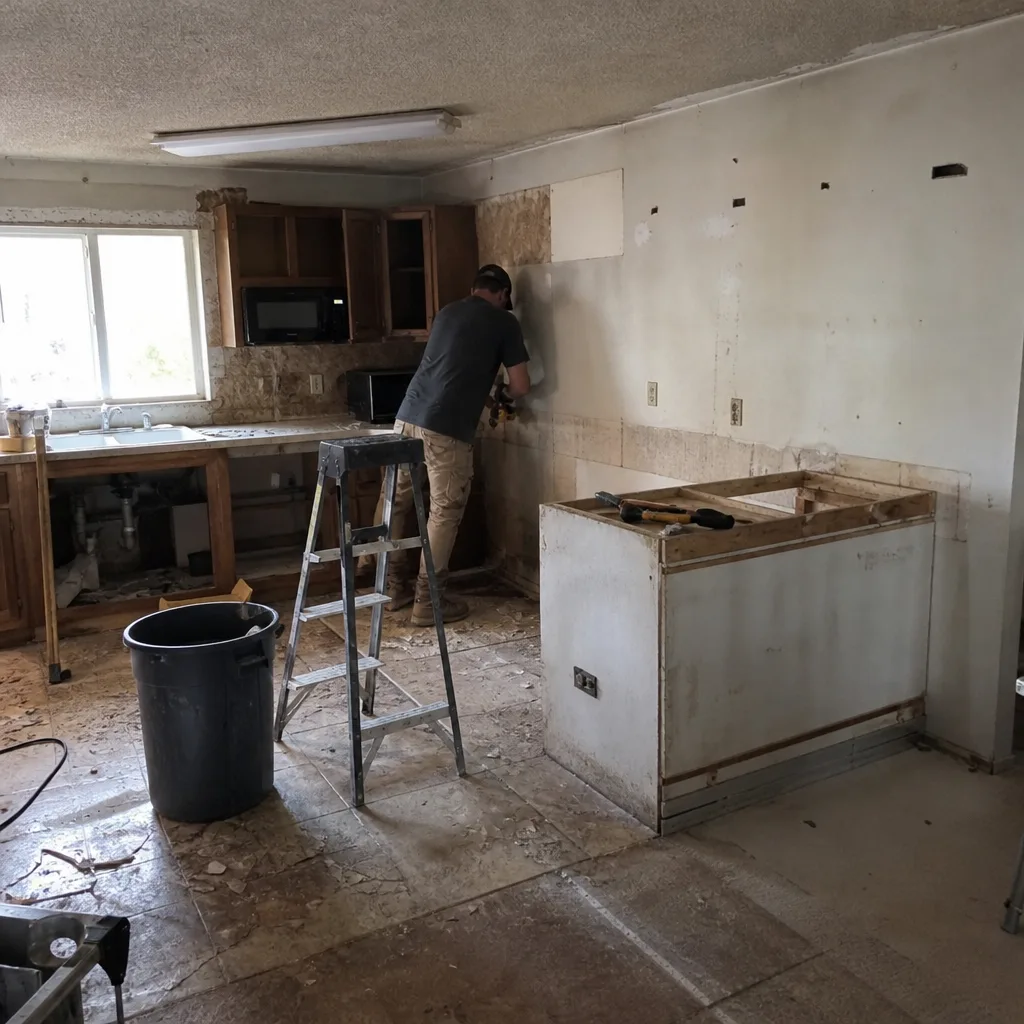 Before
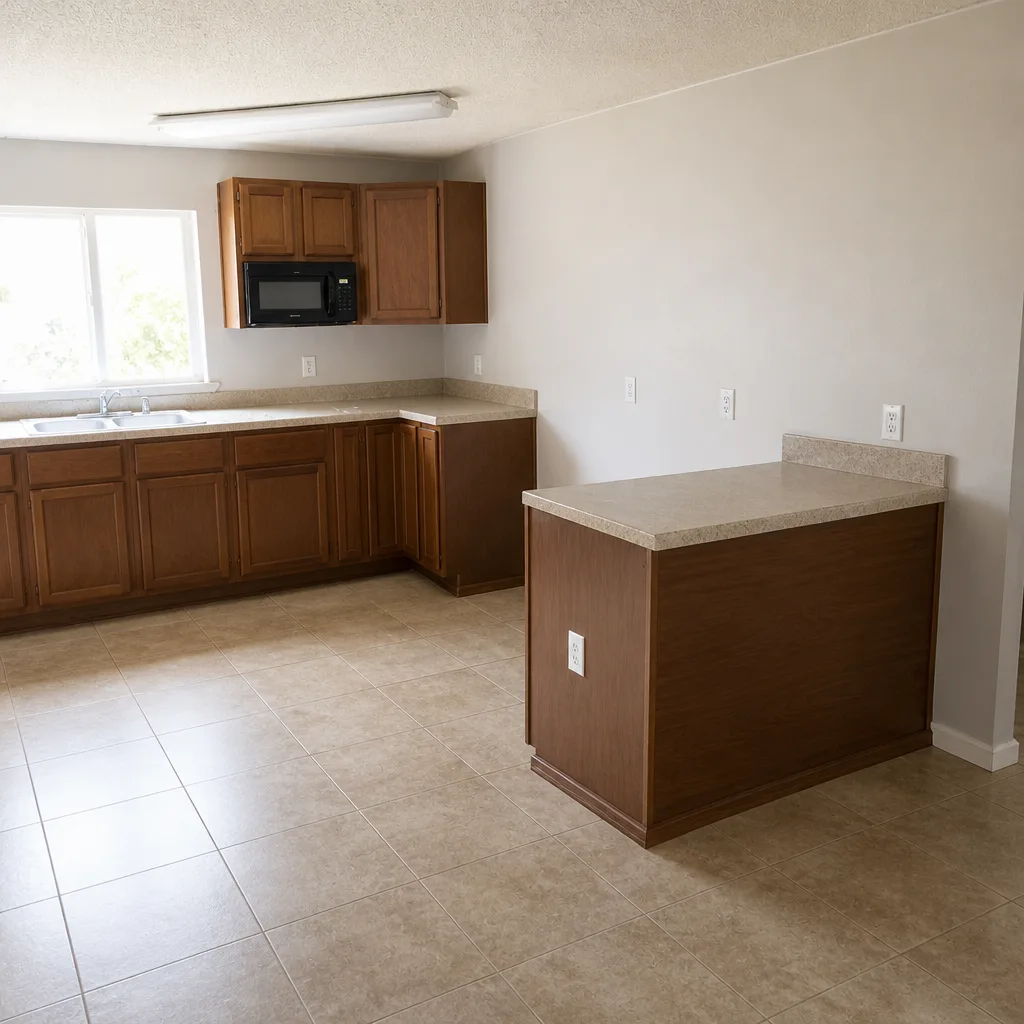 After
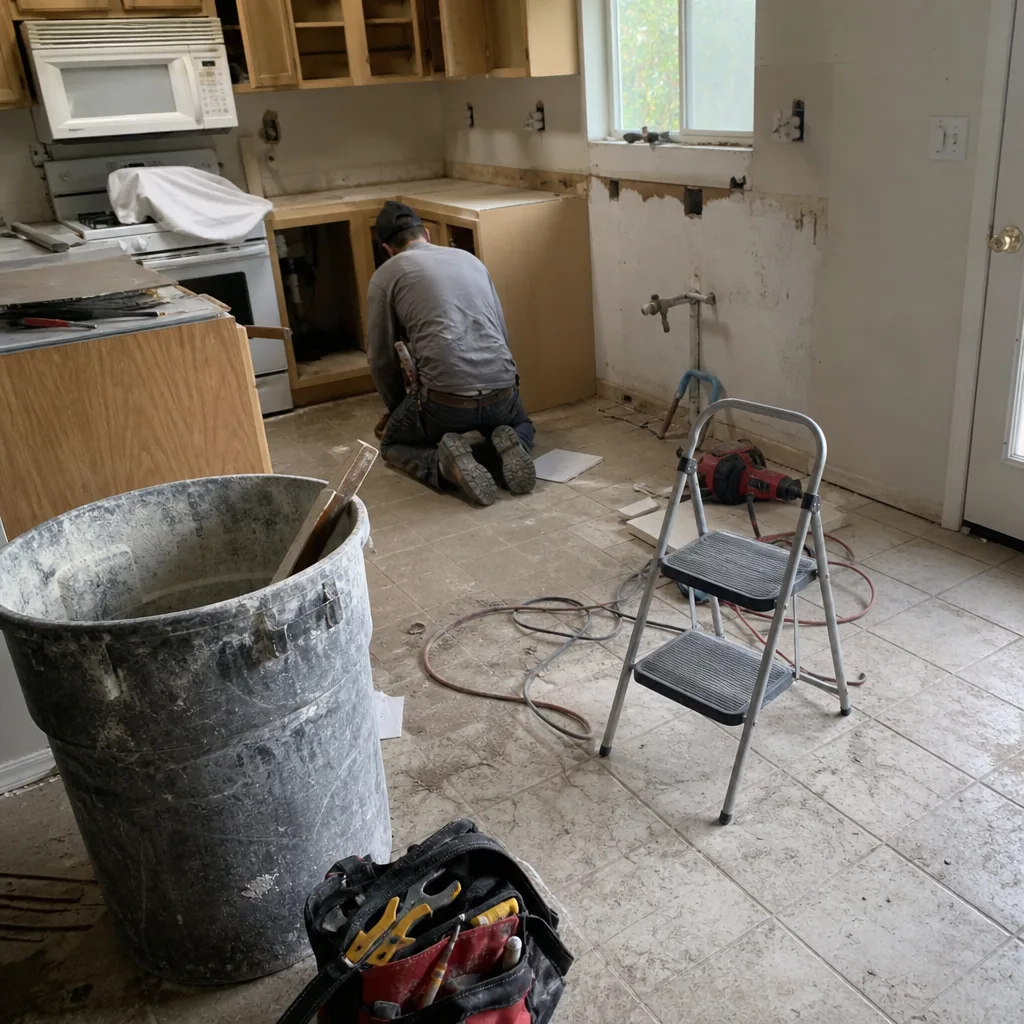 Before
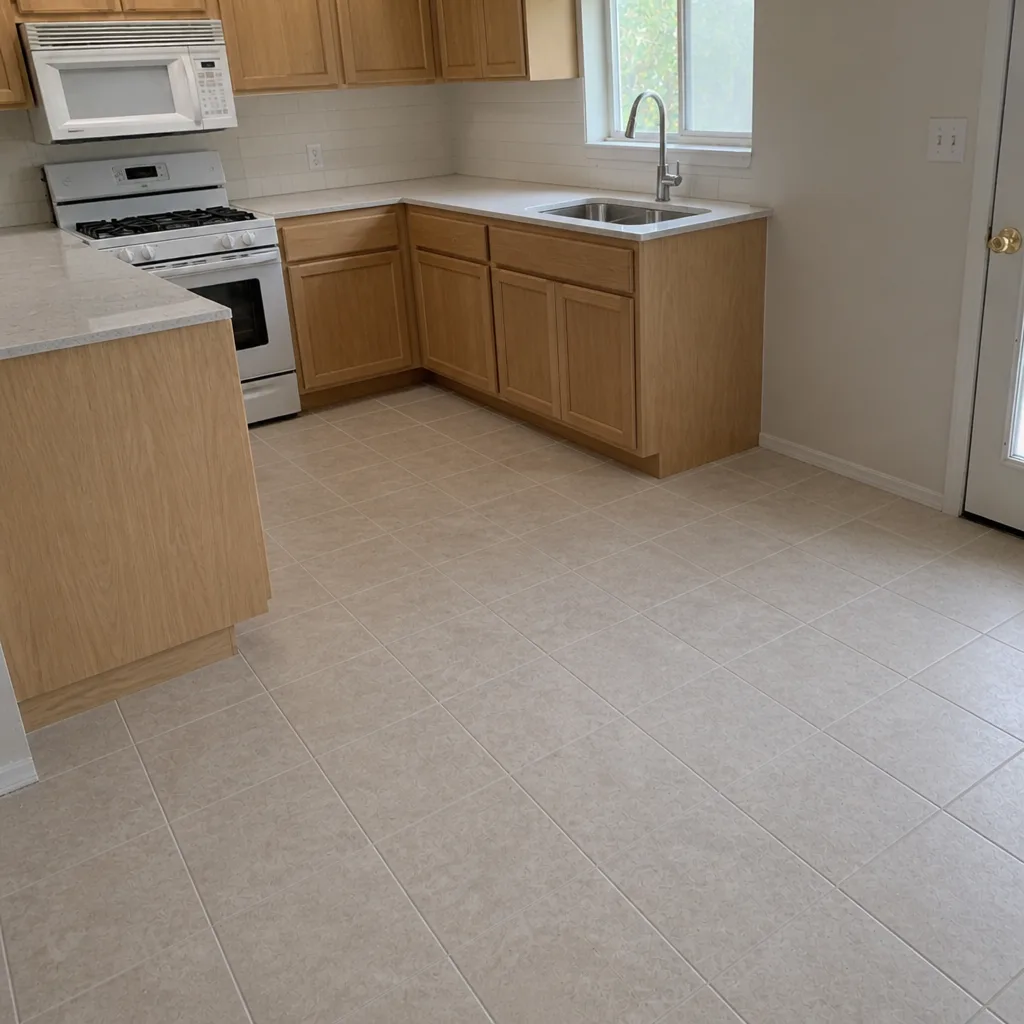 After
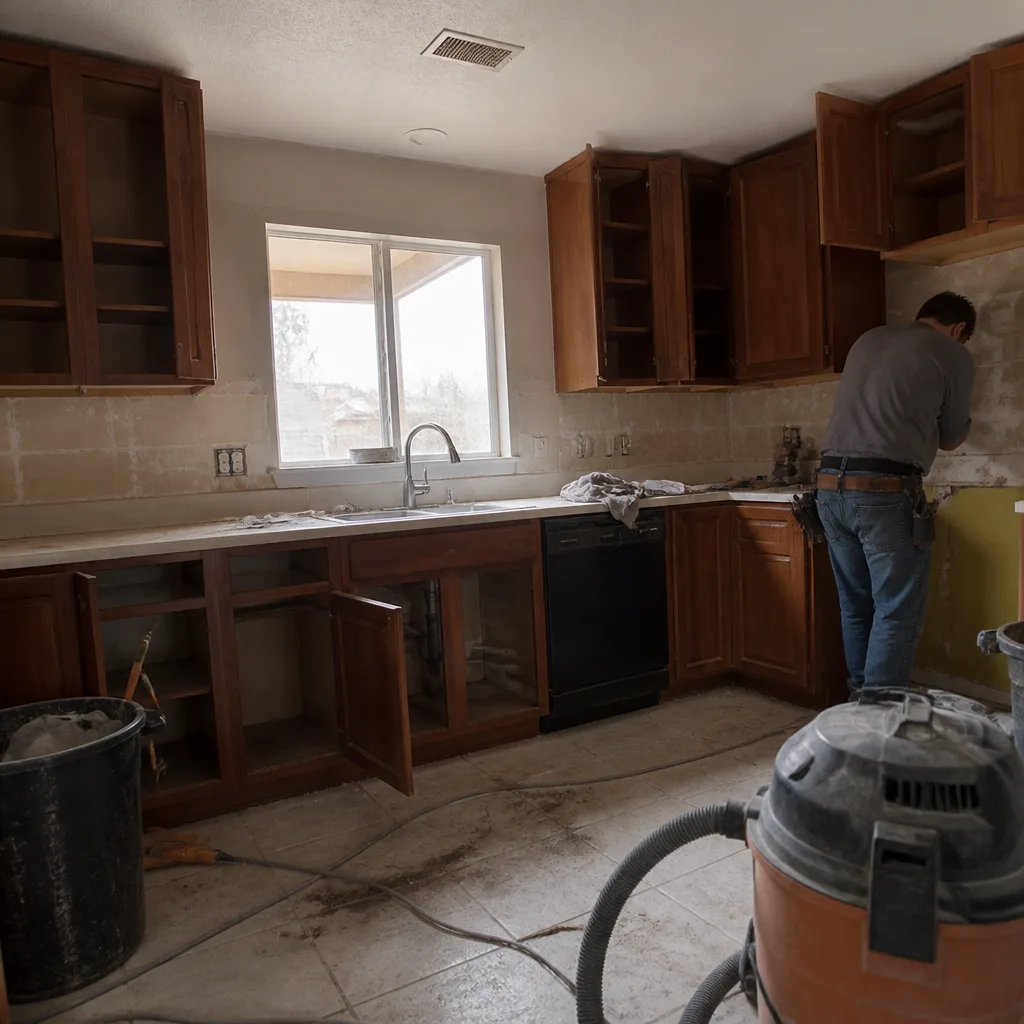 Before
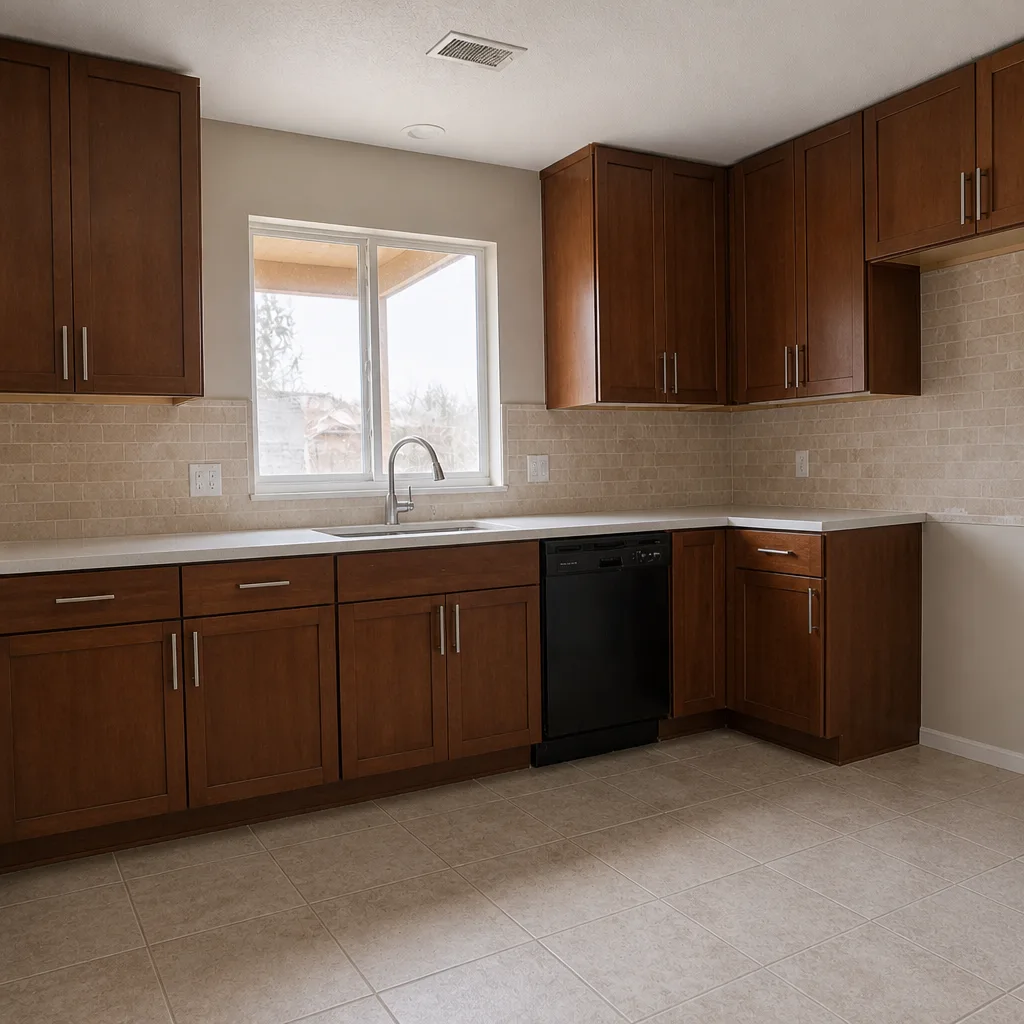 After
When to Call a Professional
Call a professional before demo day if you don’t know your shutoff locations, if your main water valve hasn’t been turned in years, or if your kitchen electrical panel load hasn’t been evaluated for the new appliances. Call during the remodel the moment you see water where it shouldn’t be, smell gas, or hear a breaker trip repeatedly. None of those are “let it sit overnight” situations. Never troubleshoot gas or live electrical work yourself; those are jobs for a licensed Nevada plumber and a licensed electrician, full stop. Kitchen Remodeling Enterprise offers free estimates in Enterprise, and walking through your layout and shutoff locations before work begins is part of the conversation. Call (833) 522-7502. We answer 24/7. Fast dispatch from 7am to 7pm, Sunday through Friday.
Frequently Asked Questions
Shut off the main water supply, flip the kitchen circuit breakers if water has reached outlets or appliances, and do not move the affected cabinet. Call your contractor and, if the source is a supply line or drain fitting, a licensed plumber. Call (833) 522-7502 for a free estimate if you haven’t started your project yet and want to plan this walkthrough before demo.
Electricians often shut off circuits during rough-in work and the refrigerator goes dark if nobody checks. Ask your electrician each evening which circuits are live and where the refrigerator is plugged in. That 30-second confirmation prevents a defrosted freezer and food cleanup. Call (833) 522-7502 to talk through the electrical plan for your remodel – estimates are free.
Yes. Nevada requires gas appliance connections to be made and certified by a licensed gas plumber, even if your general contractor handles everything else on the project. Ask for the certification in writing before you consider the job closed. Call (833) 522-7502 for a free estimate on your kitchen project.
Use a plastic zip-wall with a zipper door in the kitchen doorway, cover HVAC returns inside the kitchen, and run a box fan in a window pulling air out during lighter work. Protect flooring beyond the kitchen with cardboard or rosin paper and change it when it gets dusty. Call (833) 522-7502 to go over the containment plan for your specific layout – estimates are free.
A mini-fridge draws about 1.5 amps and a microwave draws 8 to 15 amps, so plan them on a dedicated 20-amp circuit or a low-load room rather than a kitchen outlet that’s about to be disconnected. Test the circuit by running the microwave before relying on it. Call (833) 522-7502 for a free estimate on the full remodel.
Your written line-item estimate sets the price for the scope it describes. If a hidden issue turns up once cabinets are out (unexpected water damage, a gas line that needs relocation, a panel that fails load evaluation), we discuss it with you before any change happens – never after the work is done. Call (833) 522-7502 for an exact quote; estimates are free. We answer 24/7. Fast dispatch from 7am to 7pm, Sunday through Friday.
The Bottom Line
Remodeling emergencies in Enterprise are far more predictable than they feel in the moment. Test the main shutoff before demo. Photograph every shutoff and label every kitchen breaker. Plan a temporary kitchen with dedicated power for the fridge and microwave. Seal the doorways and cover the returns before the first cabinet comes out. Let a licensed Nevada plumber handle the gas reconnection and provide the certification. Confirm the refrigerator is on a live circuit every evening during rough-in. Do those six things, and the emergency you’re planning for mostly stays theoretical. That’s the whole point of doing it before demo day.
Get a Free Estimate
If you’re ready to plan a kitchen remodel in Enterprise without the emergency side of the story, we’d like to help. Kitchen Remodeling Enterprise installs KraftMaid and Wellborn cabinetry and works with Cambria, Silestone, and Caesarstone quartz surfaces, plus Kohler, Moen, and Blanco fixtures – one team from cabinet frames to countertop edges. Our technicians have up to 10 years of experience, and we walk your shutoff locations, breaker labels, and gas plans as part of the pre-construction conversation. Call (833) 522-7502 for a free estimate. We answer 24/7. Fast dispatch from 7am to 7pm, Sunday through Friday, and we’re closed Saturday.
Written by the team at Kitchen Remodeling Enterprise.